Sign Github commits with your GPG key
Using GPG, SSH, or S/MIME, you can sign tags and commits locally. These tags or commits are marked as verified on GitHub so other people can be confident that the changes come from a trusted source.
Recently, the number of teams and organizations that require members to sign commits in their repositories has increased.
The signed commit will look like this:


For most individual users, GPG or SSH will be the best choice for signing commits. Generating a GPG signing key is more involved than generating an SSH key, but GPG has features that SSH does not. A GPG key can expire or be revoked when no longer used. GitHub shows commits that were signed with such a key as “Verified” unless the key was marked as compromised. SSH keys don’t have this capability. GitHub uses OpenPGP libraries to confirm that your locally signed commits and tags are cryptographically verifiable against a public key you have added to your account on GitHub.com.
To sign commits using GPG and have those commits verified on GitHub, follow these steps:
(gpg (GnuPG) 2.3.4 on Mac)
Generating a new GPG key
- Generate a GPG key pair.
$ gpg --full-generate-key - At the prompt, specify the number of
RSA and RSA, and pressEnter. - At the prompt, specify the key size, and press
Enter. Your key must be at least4096bits. - Enter the length of time the key should be valid. Press
Enterto specify the default selection, indicating that the key doesn’t expire. Unless you require an expiration date, I recommend accepting this default. - Verify that your selections are correct. Enter
y, then pressEnter - Enter your user ID information. When asked to enter your email address, ensure that you enter the verified email address for your GitHub account. You can leave the comment empty. Lastly review your information, enter
O, then pressEnter - It will prompt a new window. Type a secure passphrase in there. (It will automatically close the window, and you will be back to the terminal.)
- Use the
gpg --list-secret-keys --keyid-format=longcommand to list the long form of the GPG keys for which you have both a public and private key. A private key is required for signing commits or tags.$ gpg --list-secret-keys --keyid-format=long - From the list of GPG keys, copy the long form of the GPG key ID you’d like to use. In this example, the GPG key ID is
3AA5C34371567BD2:$ gpg --list-secret-keys --keyid-format=long /Users/hubot/.gnupg/secring.gpg ------------------------------------ sec 4096R/3AA5C34371567BD2 2016-03-10 [expires: 2017-03-10] uid Hubot <hubot@example.com> ssb 4096R/4BB6D45482678BE3 2016-03-10 - Paste the text below, substituting in the GPG key ID you’d like to use. In this example, the GPG key ID is
3AA5C34371567BD2:$ gpg --armor --export 3AA5C34371567BD2 # Prints the GPG key ID, in ASCII armor format - Copy your GPG key, beginning with
-----BEGIN PGP PUBLIC KEY BLOCK-----and ending with-----END PGP PUBLIC KEY BLOCK-----inclusive.
Adding a GPG key to your GitHub account
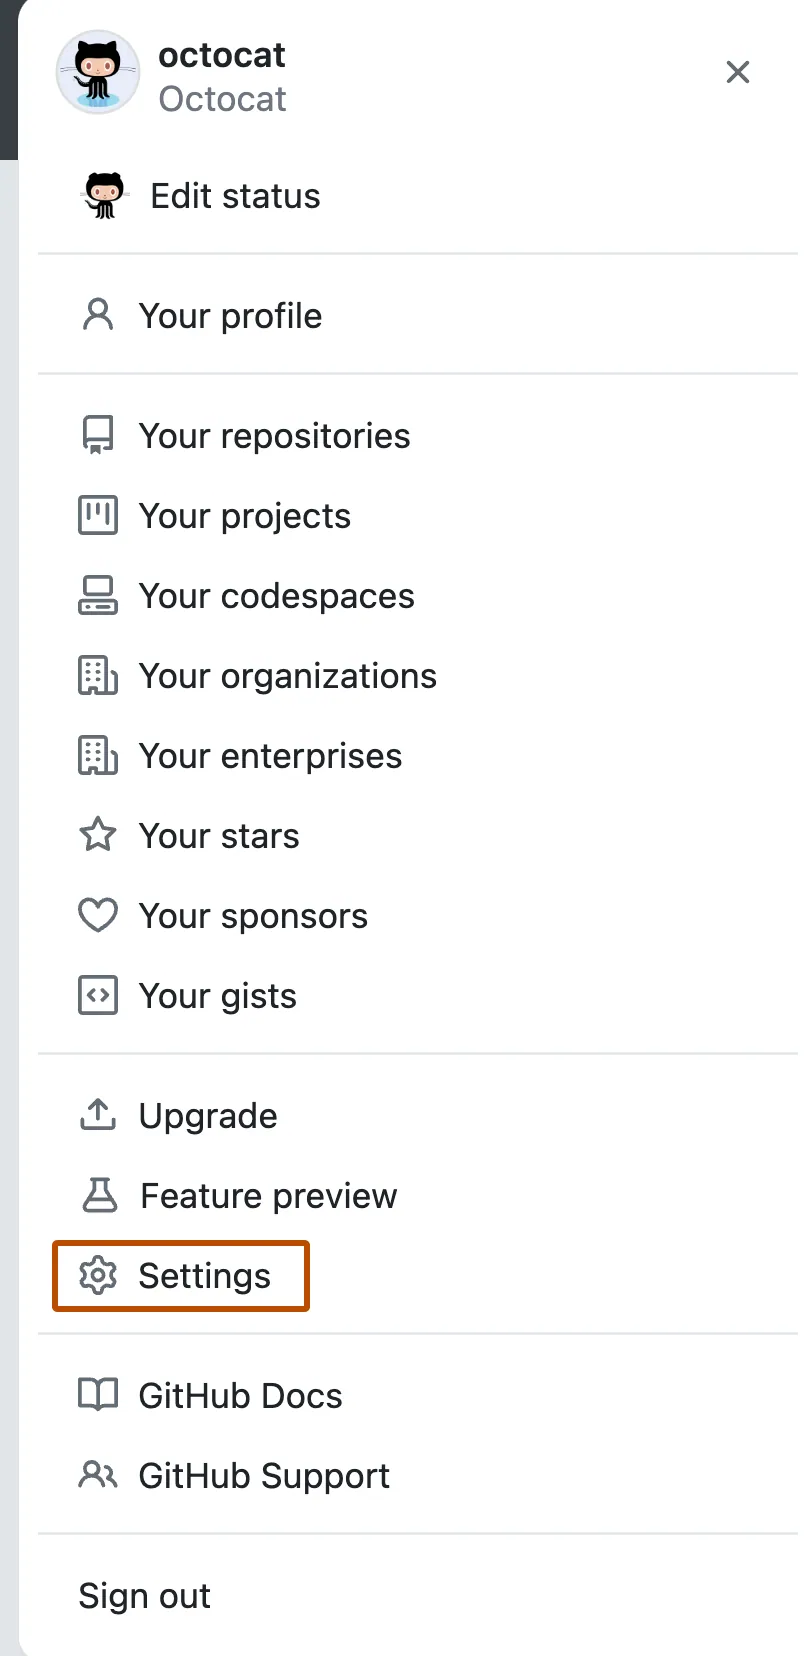
- In the upper-right corner of any page, click your profile photo, then click Settings.
- In the “Access” section of the sidebar, click 🔑SSH and GPG keys.
- Click New GPG key.

- In the “Key” field, paste the GPG key you copied when you generated your GPG key.

- Click Add GPG key.

- To confirm the action, enter your GitHub password.
Telling Git about your GPG key
- To set your primary GPG signing key in Git, paste the text below, substituting in the GPG primary key ID you’d like to use. In this example, the GPG key ID is
3AA5C34371567BD2:$ git config --global user.signingkey 3AA5C34371567BD2 - Optionally, to configure Git to sign all commits by default, enter the following command:
$ git config --global commit.gpgsign true
Signing commits
- When committing changes in your local branch, add the
-Sflag to the git commit command:$ git commit -S -m "YOUR_COMMIT_MESSAGE" # Creates a signed commit - When you’ve finished creating commits locally, push them to your remote repository on GitHub:
$ git push # Pushes your local commits to the remote repository - On GitHub, navigate to your pull request.
- On the pull request, click Commits tab.

- To view more detailed information about the verified signature, click Verified.
Reference:
https://docs.github.com/en/authentication/managing-commit-signature-verification